Join a conference
In this lesson we will learn how to and add changes to allow us to join a conference. During this journey we will perform the following tasks:
- Define the callbacks for some Infinity events.
- Update the
connectionStateand change the visible component depending on the state (Preflight,Loading,ConferenceorError). - Join a conference with the proper parameters.
- Get the local stream (camera feed) and attach it to a
HTML videoelement. - Get the remote stream (remote feed) and attach it to a
HTML videoelement. - Disconnect from a conference gracefully and free the camera.
After finishing this lesson our app will be able to join a conference that is not protected by a PIN. If you want to use a PIN, you will have to make the changes that are explained in the next lesson.
App component
We will start by modifying the file located in src/App.tsx. This file contains the main logic of our application and it's the first file that we need to change.
Create the Infinity Client
The Infinity Client is the element that will connect to the Pexip Infinity Conferencing Node and exchange the proper messages to manage a conference.
We will start by defining the signals that our application could receive from Pexip Infinity.
const infinityClientSignals = createInfinityClientSignals([]);
const callSignals = createCallSignals([]);
We will use these objects to get different types of signals:
infinityClientSignals: Thanks to this object, we will be able to detect when the call is connected, a participant joins the conference, the layout is changed or somebody raise their hand, but more signals are available.callSignals: These signals contain the basic elements for the calls to work. An example of these signals areonRemoteStreamandonRemotePresentationStream. These signals will contain aMediaStreamwith the video source that we can attach to aHTML videoelement.
Now we will define the variable that will contain the instance of the Infinity Client:
let infinityClient: InfinityClient;
And inside an useEffect hook, we create an instance of the infinityClient. We also define the dependency (error), so in case of a problem, we will create a new instance.
useEffect(() => {
  infinityClient = createInfinityClient(
    infinityClientSignals,
    callSignals,
  );
}, [error]);
Define the possible app states
It's import to keep track of the app state. The app needs to know if we are in the middle of a call, trying to connect or if there is any kind of issue when trying to connect.
We will start by defining a constant that contains all the possible states:
enum ConnectionState {
  Disconnected,
  Connecting,
  Connected,
  Error
};
Now we will use the React useState hook to define some state variables:
  const [connectionState, setConnectionState] = useState<ConnectionState>(ConnectionState.Disconnected);
  const [localStream, setLocalStream] = useState<MediaStream | null>(null);
  const [remoteStream, setRemoteStream] = useState<MediaStream | null>(null);
  const [error, setError] = useState('');
With only these four variables we can define the whole app state:
- connectionState: This state variable will store the current state for the connection. It will have one of the values that we have defined previously:
Disconnected,Connecting,ConnectedandError. - localStream: This variable will contain a
MediaStreamwith the local video obtained directly from the user's webcam. - remoteStream: In a similar way, we will have a
MediaStreamthat contains the video of all the remote participants mixed in a single stream. This stream is obtained from the Infinity Conferencing Node. - error: This variable is used to save a string with the error that happened when the user tries to join a conference. If the call was successful, it will be an empty string.
Set the event handlers
Now we need to define all the callback functions for each one of the events. We will start by defining a function that will be called each time the user tries to join a conference:
const handleStartConference = async (nodeDomain: string, conferenceAlias: string, displayName: string) => {
  setConnectionState(ConnectionState.Connecting);
  const localStream = await navigator.mediaDevices.getUserMedia({
    audio: true,
    video: true
  });
  setLocalStream(localStream);
  const response = await infinityClient.call({
    node: nodeDomain,
    conferenceAlias,
    displayName,
    bandwidth: 0,
    mediaStream: localStream
  });
  if (response != null) {
    if (response.status !== 200) {
      localStream.getTracks().forEach((track) => track.stop());
      setLocalStream(null);
    }
    switch (response.status) {
      case 200:
        setConnectionState(ConnectionState.Connected);
        break;
      case 403: {
        setConnectionState(ConnectionState.Error);
        setError('The conference is protected by PIN');
        break;
      }
      case 404: {
        setConnectionState(ConnectionState.Error);
        setError('The conference doesn\'t exist');
        break;
      }
      default: {
        setConnectionState(ConnectionState.Error);
        setError('Internal error');
        break;
      }
    }
  } else {
    setConnectionState(ConnectionState.Error);
    setError('The server isn\'t available');
  }
};
This function do the following:
- It changes the connection state to
Connecting, so the interface can display theLoadingcomponent. - Call the
getUserMedia()method. This is a method from the browser API to request access to the microphone and camera. Through this method we get aMediaStreamwith audio and video. - Assign the previous
MediaStreamto thelocalStreamstate variable. This way the local camera feed can be displayed in our interface. - Call
infinityClient.call()with all the conference info that we want to start. - Change the connection state accordingly to the call response.
Now we define the disconnect handler.
const handleDisconnect = () => {
  localStream?.getTracks().forEach((track) => track.stop());
  infinityClient.disconnect({reason: 'User initiated disconnect'});
  setConnectionState(ConnectionState.Disconnected);
};
In this case, the fist thing that this handler will do is to stop the localStream. That means that the application will release the camera, so it will be available for other applications. You will see that the camera led will turn off.
Later on, it will disconnect from the meeting indicating the reason and change the connection state to Disconnected.
When this function is triggered, we -->
Assign signal to their handlers
Now we will define which signal we want to listen and what should happen when one of these signals are received:
useEffect(() => {
  callSignals.onRemoteStream.add((stream) => setRemoteStream(stream));
  infinityClientSignals.onError.add((error) => {
    setConnectionState(ConnectionState.Error);
    setError(error.error);
  });
  infinityClientSignals.onDisconnected.add(() => setConnectionState(ConnectionState.Disconnected));
  const disconnectBrowserClosed = () => {
    infinityClient.disconnect({reason: 'Browser closed'});
  };
  window.addEventListener('beforeunload', disconnectBrowserClosed);
  return () => window.removeEventListener('beforeunload', disconnectBrowserClosed);
}, []);
This piece of code run when the Conference component is created and it does the following:
- Set the remote stream when the
onRemoteStreamsignal is received. - Trigger the proper handler when the app receives an error in the
onErrorsignal. In this case, it changes the connection state toErrorand define the string that contains theerroritself in another variable. - Change the state to
Disconnectedif the app receives theonDisconnectsignal. This happens if a host kick another user out of a conference. - Finally, assign a listener to the event
beforeunload. In this case, it will be used to disconnect the user from the conference when the user closes the window or tab that is running the app.
Return component based on state
Now we will center our focus in the application rendering. We will choose what component we should show to the user depending on the application state:
let component;
switch (connectionState) {
  case ConnectionState.Connecting:
    component = <Loading />;
    break;
  case ConnectionState.Connected:
    component = (
      <Conference
        localStream={localStream}
        remoteStream={remoteStream}
        onDisconnect={handleDisconnect}
      />
    );
    break;
  case ConnectionState.Error:
    component = <Error message={error} onClose={() => setConnectionState(ConnectionState.Disconnected)}/>;
    break;
  default:
    component = <Preflight onSubmit={ handleStartConference }/>;
    break;
}
The last step is to return the component that was selected in the switch statement:
return (
  <div className="App" data-testid='app'>
    {component}
  </div>
);
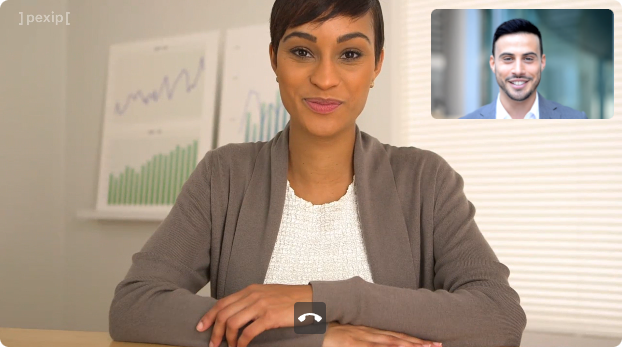
Conference component
This component is located in src/components/Conference/Conference.tsx and it will be displayed once the user joins a conference.
The first thing that we will do is to create a new component called Video. This component will add an abstraction layer and simplify the creation of the conference component.
interface VideoProps {
  className: string;
  mediaStream: MediaStream | null;
  muted?: boolean;
}
const Video = React.memo((props: VideoProps) => {
  return <video className={props.className} autoPlay playsInline
    muted={ props.muted }
    onClick={ props.onClick }
    ref={ (element) => {
      if (element) element.srcObject = props.mediaStream;
    }}
  />
});
Some things that we need to consider regarding the Video component:
- We need to use
React.memoto prevent to re-rendering of the component without changes in the props. If we didn't use this, we would notice flickering each time the video is re-rendered. - We need to use
autoPlayto start the video automatically. If we didn't use it, we would have to callvideo.play()manually which is not a good practice. - If we want to support iOS, we need to include
playsInline. If we forget to add this parameter the video will be played in fullscreen and it will break the whole experience. - We need to define the
mutedprop for this component. This way we can define easily if theVideoshould have audio or not. For example, the local video shouldn't have audio, meanwhile the remote video with the rest of the participants should have it. If we forgot to add this parameter, we would experience a small issue as the user will hear themself when they were talking. - The last thing to mention is how the
MediaStreamis assigned to theHTML video. In this case theMediaStreamis assigned to thesrcObjectvideo property.
interface ConferenceProps {
  localStream: MediaStream | null;
  remoteStream: MediaStream | null;
  onDisconnect: () => void;
}
Now we will define what to render for the conference component:
  return (
    <div className={'Conference' + additionalClasses}>
      <Video className='remote-video'
         mediaStream={props.remoteStream} onClick={ memoizedSwitchVideos }/>
      <Video className='local-video' mediaStream={props.localStream} muted={true}/>
      <Toolbar
        className='toolbar'
        onDisconnect={props.onDisconnect}
      />
    </div>
  );
This component consists in three sub-components:
remote-video: The video with the rest of the participants and their audio.local-video: The video with the webcam feed of the current user. In this case the audio is muted.toolbar: This component is the one that contains all the buttons to make actions. In the next section we will discuss how it works.
Toolbar component
The last file that we will modify in this lesson is src/components/Conference/Toolbar/Toolbar.tsx. This is the toolbar that allows us to interact with the conference. This time, we will implement a new button. This button will be used to disconnect the user from the conference on demand.
The first thing that we will do is to define the function that will be called when the button is pushed. In this case the function is quite simple, since it only calls to the disconnect function that is provided by the pexRTC object, and also triggers the onDisconnect() function that we have defined in a previous step.
We add onDisconnect to the props list:
interface ToolbarProps {
  className: string;
  onDisconnect: () => void;
}
const handleHangUp = () => {
  props.onDisconnect();
};
The final step is to add the button itself to our interface:
return (
  <div className={className}>
    <Button onClick={handleHangUp} icon={<CallEndIcon />} />
  </div>
);
Run the app
You have everything in place to launch your conferencing application. Run the command npm start and you will see the app in the browser.